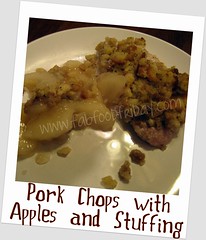
Pork Chops with Apples and Stuffing
I'm gonna be honest here and tell you that for all the cooking that I do from scratch I have a tendency sometimes to be lazy. As in seriously lazy. As in I don't want to spend a lot of time making dinner because, honestly, I'd rather be playing with my girls in the crispy leaves outside.
So this dinner is perfect for fall. It has apples (and the only thing that is more fall to me than apples is pumpkin) and stuffing. Oh, and only 3 ingredients.
The best part? Noone has to know how unbelievably simple it is unless you tell them. Because, honestly, it tastes like you spent the afternoon in your kitchen.
I got this recipe from Kraft's Food & Family magazine (it's free, so you should definitely sign up for it) and we've had it twice in a month (once with chicken instead of pork).
Prep Time: 10 min
Total Time: 50 min
Makes: 6 servings
Three Ingredients:
1 pkg. (6 oz.) Stuffing Mix for Chicken
1 can (21 oz.) apple pie filling
6 boneless pork loin chops (1-1/2 lb.), 3/4 inch thick
Make It
HEAT oven to 375ºF. Prepare stuffing mix as directed on package.
SPREAD pie filling onto bottom of 13x9-inch baking dish sprayed with cooking spray; top with chops and stuffing. Cover with foil.
BAKE 30 min.; uncover. Bake 10 min. or until chops are cooked through (160ºF).
Now remember- no one has to know how easy it was!