Showing posts with label Entertaining. Show all posts

Friday, November 18, 2011

Candied Citrus Peels – A Delicious & Frugal Gift

I'm not really a Martha Stewart wanna-be (though I know I may appear that way at times!) but when this recipe showed up in her magazine last year, along with other classic confections, I pulled the pages out of the magazine because they were so pretty. I never really intended to make them… Then came our family’s annual gathering. We don’t officially call it Christmas as it takes place in October (for my grandfather’s birthday) but we do our gift giving then.
My grandfather is impossible to buy for and wants nothing… So I have begun to gift him with homemade treats. Last year’s gift was candied citrus peels.


Despite what you may think, these are quite easy to make. They are just time consuming. But they are beautiful and people will ooh and aah over them, taste them and tell you how amazing they are. (Which means you are pretty amazing for making them!)

Here’s what you need:
2 grapefruits, 3 oranges, or 4 lemons
4 cups sugar, plus more for rolling
4 cups water

1st Step in Candied Citrus Peels


Step 1:
Using a paring knife very carefully make 6 slits along curve from top to bottom of each citrus fruit, cutting through peel but not into fruit. Using your fingers (I used a citrus peeler), gently remove peel. Reserve fruit for another use. Slice each piece of peel lengthwise into 1/4-inch-wide strips. Using a paring knife, remove excess pith from each strip and discard (this is time consuming).

Steps 2 & 3 Candied Citrus Peels


Step 2:
Place citrus strips in a large saucepan, and cover with cold water. Bring to a boil, then drain. Repeat twice (total of 3 times).

Step 3:
Bring sugar and water to a boil, stirring occasionally until sugar dissolves. Stop stirring. Wash sides of pan with a wet pastry brush to prevent sugar crystals from forming. Add strips to boiling syrup, reduce heat to medium-low, and simmer gently until strips are translucent, about 1 hour. Remove from heat, and let strips cool in syrup. (Strips in syrup will keep, covered and refrigerated, for up to 3 weeks.)

This is where I stopped on day 1 and continued the next day. I liked that I didn’t have to do it all at once.

The finish:
Using a slotted spoon, transfer strips to a wire rack placed on a rimmed baking sheet. Wipe off excess syrup with paper towels, then roll strips in sugar. Arrange in a single layer on a wire rack, and let dry for at least 30 minutes (I suggest an hour). Sugared peels will keep, covered at room temperature, for up to 2 weeks.

Candies Citrus Peel


Of course Martha Stewart has a very attractive way of packaging these. Mine didn’t package that way, but it was pretty, none-the-less.
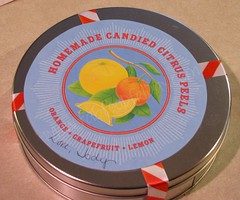
I bought a tin at Michael’s for $2.99 and holiday ribbon for $1. I cut circles for the base of the tin and the lid from waxed paper. I cut the ribbon into 2 pieces, taped the ends to the lid and attached the label to the top.
In total I spent under $10 for this gift. My grandfather enjoyed it (mostly because I took the time to make it) and everyone in my family had to try one – and then rave about them!
These are also great for any gathering you may be hosting or attending.

Friday, October 7, 2011

Apple – Cinnamon Strudel

I’m not a big fan of apple pie. I can’t really pin point the reason for that as I love apple dumplings, but the facts stand; I really don’t care for apple pie. It is fall, however, and with fall comes apple picking season. And I do love the smell of apples and cinnamon and apples baking. Mmmm… I’m not sure there is a more homey smell.


For a recent family gathering I decided to try apple strudel. I used a recipe I found in Everyday Food magazine. It turned out really well and was gone in minutes. This is best served warm (maybe with cinnamon ice cream) but is very tasty at room temperature, too. (My husband says it is a fabulous breakfast!)

The recipe “serves 6″ but those are really big pieces; you can easily serve 10-12 in my opinion.

Apple- Cinnamon Strudel


Ingredients:
* All-purpose flour, for rolling
* 1 sheet puff pastry (from a 17.3-ounce package), thawed
* 3 tablespoons unsalted butter
* 3 pounds Gala or Fuji apples (about 6), peeled, cored, and thinly sliced
* 1/2 cup plus 2 tablespoons sugar
* 1/2 teaspoon ground cinnamon

Directions:
1. Preheat oven to 400 degrees; line a baking sheet with parchment paper or foil. On a lightly floured work surface, unfold pastry; roll out to a 12-by-14-inch rectangle. Be sure you reinforce the folds in the pastry or they will split and leak during baking. Place on sheet; refrigerate.

2. In a large skillet, melt butter over medium; reserve 1 tablespoon in a small bowl. To skillet, add apples, 1/2 cup sugar, and cinnamon. Increase heat to medium-high; cook, tossing occasionally, until apples are tender and liquid has evaporated, about 15 minutes. Spread filling on a second rimmed baking sheet; let cool completely.

3. With one short side of dough facing you, mound filling horizontally in a strip across the center, leaving a 1-inch border on both long sides. Fold top part, then bottom part of dough over filling. Turn pastry over, seam side down. The easiest way to turn the filled pastry is to have the pastry on a piece of foil. After filling and folding pastry fold foil over the pastry and slowly turn the pastry enclosed in the foil. Bake on the foil to keep your baking sheet clean.

4. Brush pastry with reserved melted butter; sprinkle with remaining 2 tablespoons sugar. Using a paring knife, cut steam vents in center of pastry. Bake until golden brown, 35 to 40 minutes. Let rest 10 minutes before serving.

Sunday, July 31, 2011

Incredible Irish Car Bomb Cupcakes

There are three items that I always seem to have in my home:

The essential ingredients in Irish Car Bomb Cupcakes

Funnily enough, they are used mainly for baking and rarely for drinking. Now, with these three ingredients you could make an Irish Car Bomb: pour a pint of Guinness. In a 2 shot glass mix a shot of whiskey and a shot of Irish Cream. Drop into the Guinness and chug it down before it curdles.

Not your idea of fun? Mine either. But these incredible Irish Car Bomb cupcakes will have you thanking the brave mix-master who created the drink.

Just a note: the alcohol of the Guinness bakes out of the cupcake itself, but the ganache and frosting can be potent, depending on how much alcohol you use.

I've adapted this recipe from some of my favorite individual recipes, as well as taken tips from the BrownEyedBaker blog. This recipe makes 24 cupcakes.

Irish Car Bomb Cupcake

Ingredients
For the Cupcakes:
1 cup Guinness stout
1 cup unsalted butter; room temperature
¾ cup cocoa powder (Dutch process if you have it)
2 cups all-purpose flour
2 cups granulated sugar
1½ teaspoons baking soda
¾ teaspoons salt 2 eggs
2/3 cup sour cream

For the Whiskey Ganache Filling:
6 ounces bittersweet chocolate
2 ounces unsweetened chocolate
2/3 cup heavy cream
2 tablespoons butter; room temperature
2 teaspoons Irish whiskey

For the Baileys Frosting:
2 cups unsalted butter; room temperature
3-4 cups powdered sugar
8 tablespoons Irish Cream (taste test frosting; I tend to like mine strong)

Directions:
For Cupcakes:
Preheat oven to 350 degrees F. Line 24 cupcake cups with liners.

Bring the Guinness and butter to a simmer in a saucepan over medium heat. Add the cocoa powder and whisk until smooth. Remove from heat and allow to cool slightly.

Whisk flour, sugar, baking soda and salt in a large bowl. Using an electric mixer, beat the eggs and sour cream on medium speed until combined. Add the Guinness mixture to the egg mixture and beat just to combine. Reduce the speed to low, add the flour mixture and beat briefly. Using a rubber spatula, fold the batter until completely combined. Divide the batter among the cupcake liners.

Bake until a toothpick inserted into the center comes out clean, 15-18 minutes. Cool completely.

For Whiskey Ganache Filling:
Place 1 oz pieces of chocolate in a heatproof bowl. Heat the cream until simmering and pour it over the chocolate. Let it sit for one minute and then, using a rubber spatula, stir it until smooth. Add the butter and whiskey; stir until combined.

Let the ganache cool until thick but still soft enough to be piped. (Refrigerate if necessary)

Making Irish Car Bomb Cupcakes


Fill the Cupcakes:
Using a 1-inch round cookie cutter (or a small paring knife), cut the centers out of the cooled cupcakes, going about two-thirds of the way down. Transfer the ganache to a piping bag with a wide tip and fill the holes in each cupcake to the top (or over the top- you will have enough ganache).

Whiskey Ganache filling in Irish Car Bomb Cupcake


For Baileys Frosting:
With hand mixer, whip the butter on medium-high speed for 5 minutes, scraping the sides of the bowl occasionally. Reduce the speed to medium-low and gradually add the powdered sugar- a few tablespoons at a time- until all of it is incorporated.

Add the Baileys, increase the speed to medium-high and whip for another 2 to 3 minutes, until it is light and fluffy. Frost the cupcakes; add chocolate shavings or sprinkles if desired. Store the cupcakes in an airtight container, refrigerated, for up to 3 days.

Cross-section of Irish Car Bomb Cupcake


Friday, July 8, 2011

Individual Chocolate Mousse Cakes

There are times when nothing will do but incredibly intensely rich chocolate. And these individual chocolate mousse cakes conquer any chocolate craving. This recipe is made with only three ingredients; the cakes are both simple and decadent.

These are best if served warm, so the centers are still gooey but are quite good chilled when the middle has the texture of taffy.

Individual Chocolate Mousse Cakes


Recipe adapted from parents.com. Makes 12 individual cakes.

Ingredients

* 2 bars (7 ounces each) milk chocolate
* 6 large eggs
* 1/4 cups plus 2 tablespoons all-purpose flour

Directions

1. Heat oven to 325°F. Line a standard-size 12-cup muffin pan with paper liners.

2. Melt chocolate in microwave. Begin with one minute. Stir. The heat in 30 second increments, stirring after each, until melted.

3. Stir eggs and flour into melted chocolate with wire whisk or wooden spoon. Ladle into prepared muffin-pan cups, dividing equally.

4. Bake in 325°F oven for about 12 minutes or until sides of cupcakes are set but centers are still liquid. Cool cupcakes in pan for 5 to 10 minutes. Centers will set into warm mousse. Serve with vanilla bean ice cream.

Friday, April 15, 2011

Buttery Dinner Rolls

I’ve never been able to make a pretty dinner roll. I can remember my mom making rolls; perfectly round and golden. When I try they look lumpy and ugly (though they taste fine). I made this recipe at Thanksgiving and, for the first time, served beautiful rolls. We're making them again for Easter dinner!

Brenna helped me make these as it involved rolling the dough into balls. Fun!
The recipe came from the April 2009 Cuisine at Home magazine.

Buttery Dinner Rolls


Recipe makes 12 rolls. Warning: this is time consuming! Takes about 4 hours; 3 1/2 of it is rising time.

Ingredients
2/3 c whole milk
1/2 stick unsalted butter, diced
1/4 c sugar
1 pkg active dry yeast (2 1/4 tsp)
2 T unsalted butter, softened
3 c all-purpose flour
1 t table salt
1 egg, beaten
1 egg yolk, beaten

Directions
Heat milk in a small saucepan to 180° over mdium heat. Add 1/2 stick butter and sugar; stir to dissolve sugar. Cool mixture to 110°. Stir in yeast. Let rest in a warm place until it swells and becomes bubbly; about 10 minutes.

Grease inside of a bowl and a muffin tin with 2 T softened butter.

Whisk together flour and salt in the bowl of a stand mixer. Add yeast mixture, egg and egg yolk.
Knead mixture with a dough hook on medium speed until dough forms a ball and pulls away from the bowl; about 6-8 minutes. Add 1 T flour at a time if necessary. Place dough in buttered bowl and let rise until doubled in size; about 2 hours.

Divide dough into 36 equal portions. Shape portions into balls; place 3 each into each well of muffin tin. Cover dough with plastic wrap. (Dough may be refrigerated overnight at this point.) Let rise until doubled in size; about 1 1/2 hours (2 1/2 hours if dough was chilled).

Preheat oven to 375° with rack in lower third of oven.

Bake rolls until light brown; about 10 minutes. Cool slightly in pan before removing.

Handy tip: my kitchen tends to be cool. I heat my oven on a low setting while I mix the dough and turn it off when it becomes warm. I place my dough, covered, in here to rise. Don’t make the oven too warm.

Sunday, January 23, 2011

Fish & Hush Puppy Skillet

The minute I saw this recipe in the latest issue of Cuisine magazine I knew I would be making it. I love that it utilizes one of my favorite cooking tools: a cast iron skillet!


This is a very easy recipe to put together and is a bit lighter than traditional fish and hush puppies since it's not deep fried. The recipe calls for catfish, but I personally prefer cod, so will be making it with that fish in the future. This recipe will definitely be making a return trip to our table!

Fish & Hush Puppy Skillet


Ingredients

2 c self rising cornmeal mix (I used Jiffy corn muffin mix)
1/4 c scallions
1 red jalapeño, seeded & minced
2 tsp garlic
1/2 tsp table salt
1/2 tsp black pepper
3/4 c lager beer
1/2 c buttermilk
1 egg
1/4 c canola oil
2 catfish fillets (8 oz each) cut into 2" pieces
1/2 c fish fry mix (note: get one that is cornmeal based and used for dredging rather than batter frying)
1/2 c ketchup
1/3 c mayonaise
1 T dill pickle relish
1/2 tsp prepared horseradish

Directions

Preheat oven to 450 degrees F.

Mix cornmeal mix, scallions, jalapeño, garlic, salt and pepper in a bowl. Whisk beer, buttermilk and egg together; stir into cornmeal mixture and set aside.

Heat oil in 10 inch cast iron skillet until it shimmers.

Dredge fish in fish-fry mix, then fry in hot oil, on only one side, for 2 minutes.

Pour hush puppy batter over fish in skillet. Transfer skillet to oven and bake until golden and an inserted toothpick comes out clean- about 15 minutes. Remove and let rest 5 minutes. Loosen edges with a knife then top skillet with serving plate and flip both plate and skillet- carefully as skillet is still hot!

Whisk together ketchup, mayonnaise, relish and horseradish in a bowl for sauce.

Serve with coleslaw (of course).

Sunday, October 31, 2010

Cute and Delicious Halloween Cupcakes

My eldest's birthday falls just a few days before Halloween. If she is anything like her mother, Halloween will be her very favorite holiday. I imagine, however, that there will be few birthdays she is excited to share with ghosts, spiders and pumpkins.


This year she was excited to do just that, and a Halloween theme was chosen. Friends were thrilled to come in costume and Halloween activities were enjoyed.

Instead of cake I opted to create these super cute Halloween cupcakes I saw in Woman's Day. These were incredibly easy to make; the girls loved helping - and sneaking bits of candy!

Halloween Cupcakes

All cupcakes begin with a cupcake base. We chose a white cake as it wouldn't clash with any topping flavors.

What you need for the spider: white frosting, Mallomar (we found a generic at Fareway), Tootsie Roll midgees, M&Ms and M&Ms Minis.

To do: Top cupcake with white frosting. Cut Tootsie Roll into 8 small pieces. Soften and roll between your hands to create legs. Place legs on cupcake, hanging down sides. Place Mallomar on top o legs. Use a tiny bit of frosting to make M&Ms stick.

What you need for the ghost: white frosting, M&Ms Premiums Mint Chocolate (if you have trouble finding these chocolate rocks would look nice, too). White fondant. Doughnut hole. Mini M&Ms.

To do: Top cupcake with white frosting. Place M&Ms mint chocolates (or chocolate rocks) around the edge of the cupcake. Roll fondant to 1/8" thickness. Use a large cup to cut into a circle (4"-5" diameter). Place over doughnut. Use a bit of frosting to attach mini M&Ms eyes.

What you need for the pumpkin: green frosting (or green food color and white frosting), orange frosting (or mix red and yellow food color with white frosting), fall leaves sprinkles (mine came in a jar of 6 different sprinkles made by Wilton), doughnut hole, green apple Airhead candy.

To do: cover doughnut holes in orange frosting and refrigerate (this will make them a bit easier to handle). Frost cupcake with green frosting. Sprinkle with fall leaves. Using a small pizza cutter, cut small triangles and thin strips from green apple Airheads. Roll strips btween you hands to create vines. Top cupcake with orange doughnut. Place vines and stem on top.


I snapped the image below with my phone while at the library, but didn't get the instructions, so we just guessed at how to do some things. I think our creations turned out adorable and the girls were very impressed!

We opted not to make the vampire. Click the image to see it larger to get the list of what you need. I think construction is really self explanatory.

Friday, December 4, 2009

Chocolate Cream Puffs

Not long ago I received a coupon to try Pepperidge Farm Puff Pastry from Foodbuzz Tastemakers. I've long been a fan of their puff pastry sheets (see the list of recipes that use puff pastry) so I decided to try the new Puff Pastry Shells.

Like the puff pastry the shells are incredibly easy to use and puff up lovely and golden. I whipped up some chocolate cream to fill them with and made a wonderful dessert that was creamy and rich without being "too much".


You need:

1 package Pepperidge Farms Puff Pastry Shells (this will leave leftover pudding which is great for a snack!) To use all pudding get 3 packages of Puff Pastry Shells.

6 oz bittersweet baking chocolate

3 cups milk, divided

1 1/3 cups sugar

3 T flour

3 T cornstarch

1/2 t salt

3 egg yolks

2 T butter

1 1/2 t vanilla

Whipped cream

Directions:

Combine chocolate and 2 cups of milk in saucepan. Cook over medium heat, stir constantly, just until mixture boils. Remove from heat.

Combine sugar,flour, cornstarch and salt. In another bowl mix remaining 1 cup milk and egg yolks; add to flour mixture. Slowly add to chocolate. Cook over medium heat, stirring constantly, until mixture boils. Boil and stir for one minute. Remove from heat; stir in butter and vanilla.

Pour into dish and cover with plastic wrap, pressing wrap directly onto surface of pudding (this will keep it from getting a "skin") and chill for half an hour.

Prepare Puff Pastry Shells as directed on package.

After removing tops of baked Puff Pastry Shells according to directions, fill shells with chocolate cream and add whipped topping. Cover with pastry lid or prop it against the side.

Friday, July 10, 2009

Chocolate Turnovers

Pastries for breakfast area special treat in our house. Mostly because they are so yummy and I could eat them all in one sitting. So I held on to this recipe from Hershey's Kitchen for quite a while before I made it knowing that it would be delicious.

And I wasn't wrong. These little turnovers are so rich because they are made with dark chocolate (yum!) and a tiny bit of cinnamon. They were a HUGE hit in my house and disappeared quite quickly. Because the recipe makes 18 it's terrific to share or take to a brunch. They are especially good warm; just reheat in the microwave for about 30 seconds per 2 turnovers.

Chocolate Turnovers


Ingredients:

* 2 cups (12-oz. pkg.) dark Chocolate Chips (you can also use Semi-Sweet Chocolate Chips) divided
* 1 teaspoon ground cinnamon
* 1 package (17.3 oz.) frozen puff pastry, thawed (2 sheets)
* 1 egg, beaten with 2 teaspoons water
* 1-1/2 teaspoons shortening(do not use butter, margarine, spread or oil)

Directions:
1. Heat oven to 400°F. Combine 1-1/2 cups chocolate chips and cinnamon in small bowl; set aside.

2. Unfold one pastry sheet; roll on lightly floured surface to form 12-inch square. Cut into nine 4-inch squares. Place 1 heaping tablespoon chip mixture onto center of each square.

3. Lightly brush egg mixture onto edges of each square. Fold diagonally in half; seal edges. Transfer to ungreased baking sheet. Repeat procedure with remaining puff pastry sheet and remaining chip mixture. Lightly brush tops of turnovers with egg mixture.

4. Bake 15 minutes or until light golden brown. Remove from baking sheet to wire rack.

5. Place remaining 1/2 cup chips and shortening in small microwave-safe bowl. Microwave at MEDIUM (50%) 30 seconds; stir. If necessary, microwave at MEDIUM an additional 10 seconds at a time, stirring after each heating, just until chips are melted when stirred. Drizzle melted chocolate over each turnover. 18 servings.

Thursday, June 18, 2009

Scotch Eggs

I am a HUGE fan of Scotch Eggs. There is a lovely pub in downtown Des Moines that we visit 4-6 times a year just for their excellent fish & chips and Scotch Eggs. Having actually been in British and Irish pubs I can honestly say that they have a great ambiance and we don't feel a bit bad about taking our girls there.

What is a Scotch Egg? It is, quite simply, a hard boiled egg wrapped in sausage, coated in breadcrumbs and deep fried. Sounds divine, no?

Last week I was playing with my dinner spinner (have an iPhone or iPod Touch? Get this free app!) and trying to figure out what to do with all the sausage we got from a hog we purchased and butchered. I was impressed with the options that popped up, but the one that most caought my attention was Scotch Eggs. After browsing the various recipes I chose this one. I made a few changes, which I will detail below in italics, in the recipe.

These were great! Paired with a pint of Magners or Guinness and some Coleman's spicy mustard. Mmmmm... Delish.

Scotch Eggs


INGREDIENTS (Nutrition)

* 1 pound pork sausage meat
* 2 teaspoons Worcestershire sauce
* 4 hard-cooked eggs, peeled
* 1 tablespoon all-purpose flour
* 1/8 teaspoon salt
* 1/8 teaspoon ground black pepper
* 1 egg, beaten
* 2/3 cup dry bread crumbs
* 1 quart oil for deep frying

DIRECTIONS

1. In a medium bowl, mix together the pork sausage and Worcestershire sauce. Combine the flour, salt and pepper; mix into the sausage. If you are using plain sausage and like more flavor, add spices. I added some garlic, a bit of onion and some basil.

1.5 Make sure the eggs and the sausage are cold. I used the flour on my counter top to make the sausage patties. It helps keep it from sicking quite so much.

2. Divide the sausage into four equal parts. Pat flat on floured surface. Mold each part around one of the hard-cooked eggs, rolling between your hands to shape. Place the beaten egg and bread crumbs into separate dishes. Dip the balls into the egg, then roll in the bread crumbs until coated. Shake off any excess.

3. Heat the oil in a large saucepan or deep fryer to 365 degrees F (180 degrees C), or until a cube of bread dropped into the oil turns brown in 1 minute. Lower the eggs carefully into the hot oil. Fry for 5 minutes, or until deep golden brown.
OR
Preheat oven to 350. Heat 2 T olive oil in large pan over medium high heat. Brown all sides of the Scotch Egg adding more Olive Oil as necessary. When all are nicely browned place on foil covered baking sheet and bake for 30 minutes. Still crispy on the outside, just not deep fried so less greasy and a tiny bit better for you. Not much, but a tiny bit.

Garnish with cheddar cheese, lettuce leaves or chopped tomato.


How to hard cook eggs:

Place eggs in a saucepan and cover with cold water. Bring water to a boil and immediately remove from heat. Cover and let eggs stand in hot water for 10 to 12 minutes. Remove from hot water, cool, and peel.

Thursday, June 4, 2009

Bacon Horseradish Dip

I love horseradish. LOVE IT! SO when I saw this recipe in the The Good Home Cookbook I knew I would be making it.

This recipe is so easy, can be mixed right in the sour cream container and is so delicious it will disappear before anything else on the table. (Yes, really. I had two other dips out with this one and this one was gone long before the others.)


The recipe makes about 2 1/2 cups.

1 (16 oz) container sour cream (I used low fat)
1/2 c finely chopped crisp bacon
1 T Worcestershire sauce
2 T prepared horseradish (or a bit more if you really like it!)
1/2 t hot pepper sauce
Pinch garlic powder

Stir all ingredients together in a medium bowl (or just in the sour cream container) until well blended. Cover.

Refrigerate for several hours. Serve with chips or crackers.

Check out this cookbook. I've been pulling out so many great recipes from it!

Friday, May 15, 2009

Beef and Chicken Satay Skewers with Peanut Sauce

Satay is, traditionally, a dish of diced or sliced meats that is skewered and grilled or barbecued. It's largely popular in Southeast Asia where you will find it as "street food" (like a New York hot dog or a cheesesteak in Philly).

I like to make satay for a couple of reasons.

  1. It's quite easy. Slice meat, marinate, skewer & grill (or broil)
  2. It's food on a stick- what's not to like?
  3. Peanut sauce. My kids will tell you that everything is better with "dippies".
  4. I can make these on the grill, in the oven (on broil) or on the stove-top in a grill pan.
I have two recipes, one for beef, one for chicken; both from Everyday Food. I'll publish them both in full and then tell you how I combined them to make a recipe I really love.

Beef and Chicken Satay Skewers with Peanut Sauce


Chicken Satay Skewers
* 2 boneless, skinless chicken breast halves (6 to 8 ounces each), thinly sliced lengthwise into 12 strips
* 1 teaspoon toasted sesame oil
* 1 teaspoon soy sauce
* 1 garlic clove, minced
* 1/2 teaspoon red-pepper flakes
* Coarse salt and ground pepper
* 1/4 cup creamy peanut butter
* 2 tablespoons rice vinegar
* Vegetable oil, for pan

Directions

1. In a bowl, toss chicken with sesame oil, soy sauce, garlic, and teaspoon red-pepper flakes. Season with salt and pepper. Thread each chicken strip lengthwise onto a skewer.
2. Make dipping sauce: In a small bowl, whisk together peanut butter, vinegar, 1/4 teaspoon red-pepper flakes, and 2 to 3 tablespoons water.
3. Heat grill pan over high. Working in batches, brush pan with oil, and cook chicken until opaque throughout, 1 to 2 minutes per side. Serve chicken skewers with dipping sauce.

Beef Satay with peanut sauce
1 lb flank steak thinly sliced across the grain
1 T veg. oil such as safflower
1 t coriander
Salt and Pepper
1/2 cup chunky peanut butter
2 T light-brown sugar
1 T soy sauce
2 T lime juice

Heat broiler with rack set 4 inches from heat. Line a baking sheet with aluminum foil
On sheet toss stead with oil and coriander season with salt and pepper. Dividing evenly, thread beef strips onto skewers. Arrange on the sheet and set aside

Broil skewers of meat without turning 2-5 minutes.

In a small bowl whisk together peanut butter, sugar, soy sauce, 2 T lime juice and 1/4 C water. Serve beef skewers with peanut dipping sauce.

My version

I thought the beef was a bit bland so I used the chicken marinade for both meats. Instead of skewering right away, though, I let them both marinate for 30 minutes or so. This gave the meat a flavor of its own.

Then skewer. (Remember that if you are using wooden skewers to soak them at least 30 minutes to prevent them from burning.)

I know the beef recipe says not to turn the meat. I recommend turning the meat- I've done these in a broiler and on the grill. It just works best for me to turn the meat.

The peanut sauce: I prefer chunky peanut butter, but it's really personal preference. I basically used all the ingredients, together, to make a great dip: brown sugar, soy sauce, lime juice, rice wine vinegar & red pepper flakes. I whipped it up in my Magic Bullet (seriously, one of the best kitchen tools I own) and add water until I like the consistency (again, a personal preference).

These are always popular in my house and are great for entertaining and backyard barbecues!

Thursday, April 16, 2009

Breakfast Cupcakes with Sausage and Apples

I love recipes that surprise me. And this one really did. First, it was quite easy to make. Second, the sausage and apple combination was delicious. Third, I really love that this can be made in individual portions (as the title suggests) or as one big "griddle cake".

This is a great recipe for your upcoming Mother's Day brunch. But you don't have to wait until then to try it! The recipe came from Cuisine at Home magazine.


Breakfast Cupcakes with Sausage and Apples Collage

Use a jumbo muffin tin for 6 muffins or greased 9" cast iron skillet- it will easily serve 8-10 people.

Ingredients

Cake
* 1 1/2 c. all-purpose flour
* 1/2 c. cornmeal
* 1/3 c. packed brown sugar
* 1 Tbsp. baking powder
* 1 tsp. baking soda
* 1/8 tsp .kosher salt
* 1/2 c. plain nonfat yogurt or buttermilk
* 1/4 c. milk
* 2 Tbs. vegetable oil
* 2 eggs
* 1 egg white
* 1/2 bulk breakfast sausage
* 1 apple sliced thin ( I like honeycrisp or fuji)
For the Carmel
* 1 c. packed brown sugar
* 1/3 c. heavy cream
* 1/4 c. maple syrup
* 2 Tbs. of a good bourbon or rum (optional)
* 1 tsp. salt


Directions

1. Preheat oven to 350
2. Coat cups of jumbo muffin tin with nonstick spray, these can be baked in a greased 9 inch cast iron skillet for 30 min.
3. Combine flour, cornmeal, brown sugar, baking powder, baking soda and salt in a large bowl.
4. Combine yogurt, milk, oil, eggs, and egg white in another bowl. Set aside
5. Brown sausage in a skillet about 5 min. remove and drain on paper towel.
6. Whisk brown sugar, cream, syrup,bourbon, and salt for caramel together in a skillet over med high heat, stirring often, Bring to boil, reduce heat to medium-low and simmer for 10 min.
7. Stir sausage into flour mixture and add yogurt mixture. Stir just until combined; mixture will be slightly lumpy. Fan apples slices in bottom of cups (make sure each slice has some contact with cup). Divide caramel evenly between cup- about 4 T each cup; top with rounded 1/2 cup of batter.
8. Bake until toothpick inserted comes out clean, about 30 min.
9. Let them cool briefly and run a paring knife around the edge before turning out of muffin tin.

Friday, March 13, 2009

Homemade Cheeseburger Pizza (including Quick Pizza Dough)

Before the title scares you off I want to let you know that this is a very easy recipe! I was pleasantly surprised by just how easily this pizza came together. And how good it is! I may never order out again. Between this recipe and the calzones recipe from last year (try the quick pizza dough recipe below for these) I have your pizza needs covered.

If you've never used the dough hook that came with your mixer this is the perfect time to try it! And don't worry if you don't have a dough hook. I actually kneaded it by hand.

Cheeseburger Pizza


The recipe comes from Cuisine at Home magazine. It begins with a Quick Pizza Dough. It takes about 1 ½ hours. This recipe will make 4 - 7" pizzas (or two 12").

You Need:

1 c warm water (100-110º F)
1 pkg active dry yeast (2 ¼ t.)
1 t honey
2 ½ c all purpose flour
½ c bread flour
1 T kosher salt
2 T olive oil

Directions:

Combine water, yeast & honey in a small bowl and let stand until foamy, 5 minutes. Bring a large pot of water to a boil.

Whisk both flours and salt together in the bowl of a stand mixer (or a large bowl); add yeast mixture and oil. Mix on low speed using a dough hook until well blended, smooth & dough springs back when pressed, about 7-10 minutes. (Or mix thoroughly with your hands; dough won't spring back or look smooth but it will still work.) Transfer to an oiled bowl, place in cool oven with the pot of boiling water on the rack next to it. Allow dough to rise about an hour.

Divide dough into quarters, shape into balls and wrap in plastic. Use right away or chill up to 1 hour. (You may freeze it now. Thaw overnight in refrigerator before using.) For baking instructions see following recipe.

On to the Cheeseburger Pizza.

You Need:

Quick Pizza Dough (recipe above)
¾ lb ground beef (or ground turkey)
Salt & pepper to taste
½ c ketchup
¼ c prepared yellow mustard
2 c shredded lettuce
½ c red onion, thinly sliced (I omitted this)
½ c grape tomatoes, halved (I just sliced some regular tomato)
½ c dill pickle chips, chopped
½ c mayonnaise
¼ c dill picle juice
1 c Velveeta, shredded, divided (I used shredded pizza/Italian blend cheese)

Directions:

Preheat oven to 500ºF with a baking stone on the lowest rack. (No baking stone? No worries! I used regular baking sheets in the center rack and set the oven at 425ºF.)

Keep dough covered until ready to use.

Brown ground beef in a skillet (coat skillet with cooking spray is using very lean beef or turkey) over medium-high heat. Saute until cooked through, season with salt & pepper; drain on a paper towel lined plate.

Whisk ketchup and mustard in a small bowl; set aside.

Combine lettuce, onion, tomatoes & pickles in a bowl; whisk mayonnaise and pickle juice together in a separate bowl.

Roll one dough ball on a lightly floured surface into a 7" circle; place on pizza peel or back of a baking sheet coated with cornmeal. Spread 3T ketchup mixture onto dough, leaving a ½" border.

Brush edge of crust with oil and sprinkle with 1 t. sesame seeds. Top sauce with 1/3 c beef and ¼ c cheese. Slide pizza from the peel onto the stone and bake until cheese melts 8-10 minutes (if using a baking sheet bake for 10-12 minutes); remove from ovens. Top pizza with ¼ salad mixture and drizzle with mayonnaise sauce.

Assemble & bake remaining pizzas the same way.

Note: Don't think you have to use all the dressing on top of the pizzas! Keep some for dipping the crust! Yummy!

Thursday, January 22, 2009

Party Cheese Ball

This is an easy and tasty appetizer for any gathering- family, football, social gathering. The nice thing is that you can really mix and match ingredients in cream cheese and create just what you want.

So I'm going to give you the recipe (from Kraft) and then suggest changes you may want to make.

Party Cheese Ball


You Need
2 pkg. (8 oz. each) Cream Cheese, softened ( I use 1/3 fat)
1 pkg. (8 oz.) Shredded Sharp Cheddar Cheese
1 Tbsp. finely chopped onions
1 Tbsp. chopped red bell peppers
2 tsp. Worcestershire sauce
1 tsp. lemon juice
Dash ground red pepper (cayenne)
Dash salt
1 cup chopped Pecans

You Do
BEAT cream cheese and Cheddar cheese in small bowl with electric mixer on medium speed until well blended.

MIX in all remaining ingredients except pecans; cover. Refrigerate several hours or overnight.

SHAPE into ball; roll in pecans. Serve with assorted crackers.

Other Ideas
  • I used jarred roasted red peppers which added a great smoky flavor wo the Worchestershire sauce.
  • Shredded Gouda or Bleu Cheese instead of Cheddar- both are flavorful, bold cheeses.
  • Use pimentos instead of peppers.
  • I think that pickle relish may even be tasty.
  • Use slivered almonds instead of pecans. Chopped peanuts would also be tasty.
  • You could also roll it in crushed crackers or toasted bread crumbs.
  • Serve with celery, carrots or pepper strips.
  • Roll into a log or individual mini-cheeseballs. Make it into a football shape for Super Bowl. Or mold it for specific holidays or celebrations. (To remove from the mold dip mold in warm water for a minute or two.)

Thursday, January 15, 2009

Chocolate Cheesecake

This is an incredibly rich dessert- a little bit goes a long, long way. It's sooo yummy, though, and can be made in advance (2-3 days in the refrigerator or 3 weeks in the freezer- don't forget to defrost before serving.)

I got this recipe in a promotional mailing years ago from a company called "Great American Home Baking". I can't find an online presence for them.

Chocolate lovers rejoice! PS- this will blow your diet out of the water.

Chocolate Cheesecake


Crust
2 c chocolate wafer crumbs
5 T melted butter

Filling
3 - 8oz pkgs cream cheese, room temperature
1 c granulated sugar
5 large eggs
2 oz semi sweet chocolate, melted

Frosting
6 oz semi sweet chocolate, melted
1/2 c sour cream

To prepare crust: in a medium bowl mix together chocolate crumbs and melted butter until well blended. Press into a 9" springform pan. (I line the bottom of the pan with parchment paper).

Preheat oven to 300 degrees.

In a large bowl beat together cream cheese, sugar and eggs at medium speed until smooth. Spoon half into crust.

Stir chocolate into remaining cream cheese mixture until well blended. Drizzle over batter in pan to make swirls.

Bake for 50 minutes. Cool completely then chill, in pan covered in plastic wrap, for 2 hours.

After chilled carefully remove pan. (Cover now to freeze; thaw before frosting.)

To prepare frosting mix chocolate and sour cream in a small bowl. Spread over cheesecake and refrigerate until frosting is set. This frosting is easy to pipe so you can "pretty it up" if you want to.

Thursday, November 20, 2008

Bacon Wrapped Shrimp

Shrimp is a favorite in our house. It doesn't matter how I prepare it, it never lasts long. This appetizer was gone almost as quickly as it came out of the oven.

Bacon Wrapped Shrimp

The recipe came from Family Circle's November issue. It makes 24 pieces, so adjust accordingly for your crowd.

For shrimp skewers:
24 medium sized shrimp (if you buy smaller just put 2 shrimp in each bacon)
1/3 c prepared balsamic vinaigrette
12 slices bacon
24 pickled jalapeno slices
24 wood toothpicks (soak in water for 15 minutes to prevent sticks from burning)

For dipping sauce:
1/2 c mayonnaise
1 T chili sauce
1 T sweet pickle relish
1 T minced sweet red pepper

Directions:

Place shrimp and vinaigrette in large resealable bag; refrigerate for 15 minutes.

Microwave bacon on high for 1 minute. Cut slices in half crosswise (this makes 24 pieces) and let cool.

Heat broiler. Coat large broiler pan with nonstick cooking spray.

Remove shrimp from marinade, reserving marinade. Place one piece of bacon on work surface. Place shrimp at one end, tuck jalapeno slice into curl of shrimp. Roll bacon tightly to enclose and secure with a toothpick. Do this for all bacon & shrimp. Place on prepared pan and brush with reserved marinade. Broil 3 minutes. Turn, brush with marinade and broil 2 minutes more.

For sauce: stir together mayonnaise, chili sauce, pickle relish, red pepper and 1 T water in a small bowl. Serve with shrimp for dipping.

Notes:

I didn't use the jalapenos. And I bought small shrimp because they were on sale. I tucked 2 shrimp into each piece of bacon.

I didn't turn the shrimp during the broiling. They were still tasty.

I wrapped the shrimp ahead of time and refrigerated them until I was ready to broil. Just place on a plate and cover with plastic wrap. Don't forget to save the marinade!

Wednesday, November 19, 2008

Coconut Croissant Bread Pudding

I'll be the first to admit that bread puddings are not really high on my list of dessert goodies; mainly because most bread puddings contain raisins which I am really not fond of (but both my girls and my husband love).

I do, however, adore both coconut and chocolate which both play a BIG part in this bread pudding recipe. I made this for a gathering last weekend and although I heard many protests about how people couldn't eat another bite, half of this managed to disappear. The other half made a lovely breakfast.

The recipe is quite easy to make; don't let the time scare you as it has to set for half an hour and bake for an hour and a half.

Coconut Croissant Bread Pudding


Recipe from Family Circle Magazine.
Makes: 12 servings Bake: 90 minutes
Stand: 30 minutes
Prep: 20 minutes
View Nutrition Facts
Ingredients

* 8 egg yolks
* 4 whole eggs
* 2-1/2 cups milk
* 1 can (13.5 ounces) coconut milk
* 1 cup sugar
* 1 teaspoon coconut extract
* 1 teaspoon vanilla extract
* 1/2 teaspoon salt
* 5 large croissant pastries
* 1 cup semisweet chocoalte chips
* 1 cup sweetened flake coconut
* 1 tablespoon confectioner's sugar, for dusting, if desired

Directions

1. Whisk together egg yolks, eggs, milk, coconut milk, sugar, coconut extract, vanilla extract and salt.

2. Coat a 2-1/2-quart baking dish with nonstick cooking spray. Cut croissants in half horizontally. Place bottom halves, cut- side up, in prepared pan. Sprinkle with chocolate chips and coconut. Cover with top halves of croissants, cut-side down. Pour egg mixture over top. Top with baking sheet weighed down with cans so croissants get pressed down and submerged in liquid. Let stand 30 minutes.

3. Heat oven to 350°F. Remove baking sheet used as weight.

4. Cover pudding loosely with foil. Place pudding pan in a larger pan on oven rack. Pour hot water into larger pan to reach depth of 1 inch.

5. Bake at 350°F for 1 hour. Remove foil; bake an additional 30 minutes or until temperature registers 160°F on an instant-read thermometer. Carefully remove dish to wire rack; cool slightly. Dust with confectioners' sugar before serving.

Friday, October 31, 2008

Pork Chops with Apples and Stuffing

I'm gonna be honest here and tell you that for all the cooking that I do from scratch I have a tendency sometimes to be lazy. As in seriously lazy. As in I don't want to spend a lot of time making dinner because, honestly, I'd rather be playing with my girls in the crispy leaves outside.

So this dinner is perfect for fall. It has apples (and the only thing that is more fall to me than apples is pumpkin) and stuffing. Oh, and only 3 ingredients.

The best part? Noone has to know how unbelievably simple it is unless you tell them. Because, honestly, it tastes like you spent the afternoon in your kitchen.

I got this recipe from Kraft's Food & Family magazine (it's free, so you should definitely sign up for it) and we've had it twice in a month (once with chicken instead of pork).

Pork Chops with Apples and Stuffing


Prep Time: 10 min
Total Time: 50 min
Makes: 6 servings

Three Ingredients:

1 pkg. (6 oz.) Stuffing Mix for Chicken
1 can (21 oz.) apple pie filling
6 boneless pork loin chops (1-1/2 lb.), 3/4 inch thick

Make It

HEAT oven to 375ºF. Prepare stuffing mix as directed on package.

SPREAD pie filling onto bottom of 13x9-inch baking dish sprayed with cooking spray; top with chops and stuffing. Cover with foil.

BAKE 30 min.; uncover. Bake 10 min. or until chops are cooked through (160ºF).

Now remember- no one has to know how easy it was!

Friday, October 3, 2008

Baked Cheese and Pesto

I have a fondness for appetizers. Even more than dessert, for appetizers often involve cheese and some sort of bread or crackers.

Or, if you are very, very lucky, it will involve both. As this Baked Cheese and Pesto recipe I found in a Kraft magazine a few years ago does.

I will tell you, quite honestly, that the first time I made this it wasn't quite so pretty. The dough can be a bit tricky to work with. Just remember that no matter how bad it looks A) it still tastes good! and B) practice makes perfect.

And a tip to save yourself stress: Prepare this ahead of time- when no one else is in the kitchen looking over your shoulder- and refrigerate it until time to cook. (Of course that didn't happen to me... Why do you ask?)

Cheese and Pesto Bake Collage


1 can (4 oz.) refrigerated crescent dinner rolls
1 pkg. (8 oz.) Cream Cheese (use 1/3 fat type to cut calories)
2 Tbsp. pesto
2 Tbsp. chopped roasted red peppers (chopped)
1 egg, lightly beaten

PREHEAT oven to 350°F. Unroll dough on lightly greased baking sheet; firmly press seams together to form 12x4-inch rectangle.

CUT cream cheese horizontally in half with sharp knife. Place one of the cream cheese pieces on half of dough; top with 1 Tbsp. of the pesto and the peppers. Cover with remaining cream cheese piece; spread top with remaining 1 Tbsp. pesto. Brush dough with egg; fold in half to completely enclose filling. Press edges of dough firmly together to seal. Brush top with any remaining egg.

BAKE 15 to 18 min. or until lightly browned. Cool 10 min. Serve with crackers or toasted pita chips and cut-up fresh vegetables.

I used one of the girls' toy cookie cutters to make the little shapes on the top.

Blogger template 'Pinki' by Ourblogtemplates.com 2008

Jump to TOP

ss_blog_claim=cc9e1d94f6274b95f747d51cccacf62a