Showing posts with label Holidays. Show all posts

Friday, November 18, 2011

Candied Citrus Peels – A Delicious & Frugal Gift

I'm not really a Martha Stewart wanna-be (though I know I may appear that way at times!) but when this recipe showed up in her magazine last year, along with other classic confections, I pulled the pages out of the magazine because they were so pretty. I never really intended to make them… Then came our family’s annual gathering. We don’t officially call it Christmas as it takes place in October (for my grandfather’s birthday) but we do our gift giving then.
My grandfather is impossible to buy for and wants nothing… So I have begun to gift him with homemade treats. Last year’s gift was candied citrus peels.


Despite what you may think, these are quite easy to make. They are just time consuming. But they are beautiful and people will ooh and aah over them, taste them and tell you how amazing they are. (Which means you are pretty amazing for making them!)

Here’s what you need:
2 grapefruits, 3 oranges, or 4 lemons
4 cups sugar, plus more for rolling
4 cups water

1st Step in Candied Citrus Peels


Step 1:
Using a paring knife very carefully make 6 slits along curve from top to bottom of each citrus fruit, cutting through peel but not into fruit. Using your fingers (I used a citrus peeler), gently remove peel. Reserve fruit for another use. Slice each piece of peel lengthwise into 1/4-inch-wide strips. Using a paring knife, remove excess pith from each strip and discard (this is time consuming).

Steps 2 & 3 Candied Citrus Peels


Step 2:
Place citrus strips in a large saucepan, and cover with cold water. Bring to a boil, then drain. Repeat twice (total of 3 times).

Step 3:
Bring sugar and water to a boil, stirring occasionally until sugar dissolves. Stop stirring. Wash sides of pan with a wet pastry brush to prevent sugar crystals from forming. Add strips to boiling syrup, reduce heat to medium-low, and simmer gently until strips are translucent, about 1 hour. Remove from heat, and let strips cool in syrup. (Strips in syrup will keep, covered and refrigerated, for up to 3 weeks.)

This is where I stopped on day 1 and continued the next day. I liked that I didn’t have to do it all at once.

The finish:
Using a slotted spoon, transfer strips to a wire rack placed on a rimmed baking sheet. Wipe off excess syrup with paper towels, then roll strips in sugar. Arrange in a single layer on a wire rack, and let dry for at least 30 minutes (I suggest an hour). Sugared peels will keep, covered at room temperature, for up to 2 weeks.

Candies Citrus Peel


Of course Martha Stewart has a very attractive way of packaging these. Mine didn’t package that way, but it was pretty, none-the-less.

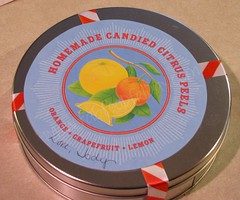
I bought a tin at Michael’s for $2.99 and holiday ribbon for $1. I cut circles for the base of the tin and the lid from waxed paper. I cut the ribbon into 2 pieces, taped the ends to the lid and attached the label to the top.
In total I spent under $10 for this gift. My grandfather enjoyed it (mostly because I took the time to make it) and everyone in my family had to try one – and then rave about them!
These are also great for any gathering you may be hosting or attending.

Friday, November 4, 2011

Brie En Croute

I've made this appetizer a few times now and everyone just raves about it. It’s delish! The brown sugar and walnus add an incredible sweetness and crunch to the brie. And it’s super easy to make. In fact, I think I’ll make it for my family’s Christmas gathering. Mmmm…

The recipe comes from Paula Deen and the Food Network.

And, just so you sound really smart, en croute means “in a crust”.

Brie En Croute


Ingredients
* 1 sheet frozen puff pastry (I prefer Pepperidge Farm)
* 1 tablespoon unsalted butter
* 1/2 cup walnuts
* 1/8 teaspoon ground cinnamon
* 1 (8-ounce) wheel Brie
* 1/4 cup brown sugar
* 1 egg, beaten

Directions
Preheat oven to 375 degrees F.

Defrost puff pastry for approximately 15 to 20 minutes and unfold. Press seams together to strengthen and lightly roll pastry; about 1″ width and length.

In a saucepan, melt the butter over medium heat. Saute the walnuts in the butter until golden brown, approximately 5 minutes. Add the cinnamon and stir until walnuts are coated well; remove from heat.

Lay the puff pastry out on a flat surface. Place the brie in the center of the pastry. Place the walnut mixture on top of the Brie and sprinkle the brown sugar over the mixture. Gather up the edges of the brie, pressing around the brie and gather at the top. Gently squeeze together the excess dough and fold down, almost like wrapping a present. (If you have kitchen twine you can tie the pastry together,like the top of a sack.)

Brush the beaten egg over top and side of Brie. Place Brie on a cookie sheet and bake for 20 minutes until pastry is golden brown.

Serve with crackers.

Friday, April 15, 2011

Buttery Dinner Rolls

I’ve never been able to make a pretty dinner roll. I can remember my mom making rolls; perfectly round and golden. When I try they look lumpy and ugly (though they taste fine). I made this recipe at Thanksgiving and, for the first time, served beautiful rolls. We're making them again for Easter dinner!

Brenna helped me make these as it involved rolling the dough into balls. Fun!
The recipe came from the April 2009 Cuisine at Home magazine.

Buttery Dinner Rolls


Recipe makes 12 rolls. Warning: this is time consuming! Takes about 4 hours; 3 1/2 of it is rising time.

Ingredients
2/3 c whole milk
1/2 stick unsalted butter, diced
1/4 c sugar
1 pkg active dry yeast (2 1/4 tsp)
2 T unsalted butter, softened
3 c all-purpose flour
1 t table salt
1 egg, beaten
1 egg yolk, beaten

Directions
Heat milk in a small saucepan to 180° over mdium heat. Add 1/2 stick butter and sugar; stir to dissolve sugar. Cool mixture to 110°. Stir in yeast. Let rest in a warm place until it swells and becomes bubbly; about 10 minutes.

Grease inside of a bowl and a muffin tin with 2 T softened butter.

Whisk together flour and salt in the bowl of a stand mixer. Add yeast mixture, egg and egg yolk.
Knead mixture with a dough hook on medium speed until dough forms a ball and pulls away from the bowl; about 6-8 minutes. Add 1 T flour at a time if necessary. Place dough in buttered bowl and let rise until doubled in size; about 2 hours.

Divide dough into 36 equal portions. Shape portions into balls; place 3 each into each well of muffin tin. Cover dough with plastic wrap. (Dough may be refrigerated overnight at this point.) Let rise until doubled in size; about 1 1/2 hours (2 1/2 hours if dough was chilled).

Preheat oven to 375° with rack in lower third of oven.

Bake rolls until light brown; about 10 minutes. Cool slightly in pan before removing.

Handy tip: my kitchen tends to be cool. I heat my oven on a low setting while I mix the dough and turn it off when it becomes warm. I place my dough, covered, in here to rise. Don’t make the oven too warm.

Friday, March 18, 2011

Bailey's Creme Brulee

I first had a version of this dessert at Raglan Road Irish Pub in Kansas City. And while at Kansas City Irish Fest I found this recipe posted in one of the tents. Wanting to recreate the creamy goodness we had experienced the night before I snapped a photo of the recipe.

I made this for the first time at my Irish Feast and it got rave reviews! Don't be overwhelmed by the thought of making creme brulee- this is quite easy!

Bailey's Creme Brulee

And, because I'm lazy, I'm going to publish the photo of the recipe instead of typing the whole thing out. I'll add notes after the photo.

Bailey's Creme Brulee Recipe

Tips:

  • You can use vanilla extract in this- 2 tsp added with the cream

  • For water bath tips see my cheesecake post.

  • If you don't have a torch use your oven broiler. Just watch it very closely- you want the sugar just golden.
Enjoy!

Friday, January 7, 2011

Cheddar Ale Soup

Because my family lives so close together we gather annually for Christmas. The kids open gifts from their cousins and grandparents and we adults plan a meal that usually centers around soups for the main dish.

This year I found a recipe in the Williams Sonoma catalog that I had to try. They were doing an "English Christmas" theme and the Cheddar Ale Soup sounded like just the thing to follow an afternoon of sledding.

The soup was smooth and rich and pairs wonderfully with fresh baked Irish Brown Bread.


Cheddar Ale Soup

Ingredients

4 thick cut bacon slices, cut into 3 " strips
2 Tbs. unsalted butter (If you omit the bacon, use 4T butter)
1 yellow onion, finely diced
2 celery stalks, finely diced
2 carrots, peeled and finely diced
3 cloves minced garlic
1/3 cup all-purpose flour
1 c pale ale
1 Tbs. Worcestershire sauce
2 c milk
2 c chicken broth
1 1/4 lb. sharp cheddar cheese, grated
Kosher salt and ground pepper, to taste

In a large, heavy soup pot or Dutch oven, cook bacon over medium high heat, approx. 8 minutes. Drain on paper towels; discard all but 2 T of bacon fat.

Reduce heat to medium add and melt the butter. Add the onion, celery and carrots and cook, covered, until soft- about 20 minutes. Add garlic, cook 1 minute.

Stir in the flour and cook for 3 or 4 minutes.

Add ale, stir constantly 3-4 minutes.

Add Worcestershire, milk and broth; bring to a simmer over medium high heat. Reduce heat to medium low; simmer 10-12 , minutes.

Puree with an immersion blender.

Set pot over medium low heat. Add cheese by handfuls, stirring constantly; do not boil. Season with salt and pepper.

Garnish with crumbled bacon. Serves 4 to 6.

Tuesday, December 21, 2010

Homemade Hot Cocoa Mix and Minty Marshmallow Recipes

As much as I hate to admit it, winter is really and truly here. The positive side of that, however, is that it's time for hot cocoa and marshmallows!

This year I made hot cocoa mix from a recipe my mom used when I was a kid and tried my hand at making marshmallows. It all turned out so nicely that we gave homemade cocoa and minty marshmallows as teacher gifts this year!

Cocoa Mix and Minty Marshmallows

Hot Cocoa Recipe
The cocoa recipe is quite easy and makes a lot of mix. If you store it in a airtight container it will keep for 6 months.

Ingredients
10 cups nonfat dry milk powder
1 can (15 ounces) instant chocolate drink mix (the kind used to make chocolate milk; not hot cocoa mix)
1-1/3 cups powdered nondairy creamer
2 cups confectioners' sugar
Directions
In an airtight container, combine all ingredients. A tip for mixing ingredients: Use a large plastic tub with a lid (an old ice cream bucket works well). Put in about half the powdered milk, half the cocoa mix and half the powdered sugar. Then add the creamer and layer the rest of the ingredients on. Tightly attach the lid and rotate the container to mix.
Yield: 13 cups mix (about 41 servings).

Minty Marshmallow Recipe
This recipe came to me as a part of the Betty Crocker Holiday Trends. I made just a couple changes...

These are so much better than purchased marshmallows! Just skip the mint if you're not a fan.

Ingredients
Butter
1/3 cup powdered sugar
1/2 cup cold water
2 1/2 tablespoons unflavored gelatin
1 1/2 cups granulated sugar
1 cup corn syrup
1/4 teaspoon salt
1/2 cup water
1 teaspoon peppermint extract
8 to 10 drops red or green food color

Directions
1. Generously grease bottom and sides of 11x7-inch (2-quart) glass baking dish with butter; sprinkle with 2 tablespoons of the powdered sugar (I used more to help with the stickiness). Pour 1/2 cup cold water into bowl of heavy-duty mixer fitted with paddle or whisk attachment. Sprinkle gelatin over water; set aside. (Handy tip: if you buy Knox gelatin in packets, each packet is 1Tbsp.)

2. In 2-quart heavy saucepan, heat granulated sugar, corn syrup, salt and 1/2 cup water over low heat, stirring constantly, until sugar is dissolved. Increase heat to medium-low and heat syrup to boiling. Boil without stirring until syrup reaches 240°F on candy thermometer, about 15 to 20 minutes; remove from heat.

3. With mixer running at low speed, slowly pour hot syrup into gelatin mixture in thin stream down side of bowl (avoid pouring syrup onto paddle or whisk, as it may splash). Gradually increase speed to medium-high; beat until mixture is white and has almost tripled in volume, about 8 to 10 minutes. Add peppermint extract and beat to blend, about 30 seconds longer. Randomly drop four drops of red or green food color into marshmallow mixture in bowl; fold 3 to 4 times to swirl color.

4. Pour into baking dish. Smooth top with damp rubber spatula. Drop red or green food color randomly on top of marshmallow mixture. Using toothpick, pull food color through marshmallow mixture to create swirl pattern over top. Let stand uncovered at least 4 hours.

5. Sprinkle cutting board with about 1 tablespoon of the powdered sugar (again, I used more. I also sprinkled the top of the marshmallows with powdered sugar before removing them from the dish). Place remaining powdered sugar in small bowl. To remove marshmallow mixture, loosen sides from dish, and gently lift in one piece onto cutting board. Spray sharp knife with cooking spray (I found it worked better if I didn't use cooking spray, but dusted my knife with powdered sugar). Cut marshmallows into 1-inch squares (11 rows by 7 rows). Dust bottom and sides of each marshmallow by dipping into bowl of powdered sugar (I tossed marshmallows in the dish, rolled them in the sugar and then rolled them in my hands to dust off the extra sugar. This kept the marshmallows from sticking together in the container). Store in airtight container at room temperature up to 3 weeks.

About the cups
I found a dozen plain white cups at Walmart for $9. At Michael's I purchased Porcelain 150 paints and fine point marker. I brushed my girls hands with the paints and had them grip the cups. After those dried for 24 hours I added the text. After another day of drying I baked the cups for 35 minutes. They are dishwasher safe and the girls grandparents have a thoughtful gift.

Sunday, December 12, 2010

Giving the Gift of Food with Hickory Farms

I struggle with what to get my husband's parents for Christmas. Both sets have so much "stuff" that I dislike getting them things. And, to be honest, my family puts more emphasis on spending time together and less on gifts (my parents get nothing from us and we get nothing from them) so this whole idea of we "must" get them a gift still overwhelms me.


When I received the Party Planner Gift Box ($40) from Hickory Farms I felt an idea forming. As my family enjoyed the meats and cheeses the idea seemed (tasted) even better.

December is such a busy month with parties, church activities, school programs and gatherings that it is often nice to just sit down with meats and cheeses to snack on while you enjoy a movie or spend time with family. Because it's food I know my gift won't sit on a shelf and collect dust. And because it's yummy I know it will be eaten and enjoyed. (The cranberry mustard is divine!)

You can usually find a Hickory Farms display in your local mall, or order online and have it shipped. Either way you're giving a gift that will be enjoyed.

For our soldiers: many of the gift boxes ship free to APO/FPO military addresses.

Disclosure: I was given the Party Planner Gift Box from Foodbuzz and Hickory Farms to sample and share my thoughts. I was not paid for this review.

Sunday, November 28, 2010

Hot Chocolate Cupcakes

My sister wanted to make a chocolate dessert for our family's Thanksgiving gathering. I had just pulled this recipe from the latest Family Circle magazine but hadn't had a chance to try them.


Of course they were a hit. The adults enjoyed them but the kids adored them! Tasty little cupcakes that look like their favorite winter drink- and covered with marshmallows! What's not to like?

This is a great recipe for the kids to help with. From working the mixer and adding ingredients to decorating with marshmallows and the candy cane.

The only thing I would change the next time I make these is to add about 2oz melted semisweet chocolate to the cake batter for a bit more richness and moisture. You'll see that addition in the recipe in italics.

Hot Chocolate Cupcakes

Recipe makes 12 cupcakes

Ingredients
1 cup all-purpose flour
1/4 cup unsweetened cocoa powder
1/2 teaspoon baking soda
1/4 teaspoon salt
6 tablespoons unsalted butter, softened
1/2 cup granulated sugar
2oz semi sweet bakers chocolate, melted and slightly cooled
2 large eggs
1 teaspoon vanilla extract
1/2 cup milk
2 cups confectioners' sugar
1/4 cup solid vegetable shortening
2 tablespoons plus 2 teaspoons milk or water
1 1/4 cups mini marshmallows
3 candy canes

Directions
1. Heat oven to 350 degrees F. Line indents of a standard-size 12-cup muffin pan with cupcake liners.
2. Cupcakes. In medium-size bowl, combine flour, cocoa powder, baking soda and salt.
3. In large bowl, with mixer on medium-high speed, beat butter and sugar until smooth and creamy, 2 minutes. Slowly mix in 2 oz melted semi sweet bakers chocolate. Beat in eggs and vanilla until fluffy, 1 minute. On low speed, beat in flour mixture alternately with milk, beginning and ending with flour mixture. Fill each cupcake liner two-thirds full (about 3 tablespoons of batter per liner).
4. Bake at 350 degrees F for 25 minutes or until toothpick inserted in centers comes out clean. Remove cupcakes
from pan to wire rack; let cool.
5. Topping. In medium-size bowl, with mixer on low speed, beat confectioners sugar, shortening and milk or water until smooth. Spread over cupcakes, about 2 tablespoons for each. Top each cupcake with 8 or 9 mini
marshmallows. With a serrated knife, cut wrapped candy canes into 2-inch pieces. Unwrap and tuck a piece into each cupcake.

291 calories per cupcake

Sunday, October 31, 2010

Cute and Delicious Halloween Cupcakes

My eldest's birthday falls just a few days before Halloween. If she is anything like her mother, Halloween will be her very favorite holiday. I imagine, however, that there will be few birthdays she is excited to share with ghosts, spiders and pumpkins.


This year she was excited to do just that, and a Halloween theme was chosen. Friends were thrilled to come in costume and Halloween activities were enjoyed.

Instead of cake I opted to create these super cute Halloween cupcakes I saw in Woman's Day. These were incredibly easy to make; the girls loved helping - and sneaking bits of candy!

Halloween Cupcakes

All cupcakes begin with a cupcake base. We chose a white cake as it wouldn't clash with any topping flavors.

What you need for the spider: white frosting, Mallomar (we found a generic at Fareway), Tootsie Roll midgees, M&Ms and M&Ms Minis.

To do: Top cupcake with white frosting. Cut Tootsie Roll into 8 small pieces. Soften and roll between your hands to create legs. Place legs on cupcake, hanging down sides. Place Mallomar on top o legs. Use a tiny bit of frosting to make M&Ms stick.

What you need for the ghost: white frosting, M&Ms Premiums Mint Chocolate (if you have trouble finding these chocolate rocks would look nice, too). White fondant. Doughnut hole. Mini M&Ms.

To do: Top cupcake with white frosting. Place M&Ms mint chocolates (or chocolate rocks) around the edge of the cupcake. Roll fondant to 1/8" thickness. Use a large cup to cut into a circle (4"-5" diameter). Place over doughnut. Use a bit of frosting to attach mini M&Ms eyes.

What you need for the pumpkin: green frosting (or green food color and white frosting), orange frosting (or mix red and yellow food color with white frosting), fall leaves sprinkles (mine came in a jar of 6 different sprinkles made by Wilton), doughnut hole, green apple Airhead candy.

To do: cover doughnut holes in orange frosting and refrigerate (this will make them a bit easier to handle). Frost cupcake with green frosting. Sprinkle with fall leaves. Using a small pizza cutter, cut small triangles and thin strips from green apple Airheads. Roll strips btween you hands to create vines. Top cupcake with orange doughnut. Place vines and stem on top.


I snapped the image below with my phone while at the library, but didn't get the instructions, so we just guessed at how to do some things. I think our creations turned out adorable and the girls were very impressed!

We opted not to make the vampire. Click the image to see it larger to get the list of what you need. I think construction is really self explanatory.

Blogger template 'Pinki' by Ourblogtemplates.com 2008

Jump to TOP

ss_blog_claim=cc9e1d94f6274b95f747d51cccacf62a